Middle School Inequalities Worksheets

All worksheets are created by the team of experienced teachers at Cazoom Math.
What Are the Most Common Mistakes Students Make with Inequalities?
Students frequently reverse inequality symbols when multiplying or dividing by negative numbers, treating inequalities exactly like equations. This misconception appears consistently on state assessments and classroom tests, where students lose points even when their algebraic steps are otherwise correct. Teachers notice this error persists because students apply equation-solving rules without considering the direction of the inequality.
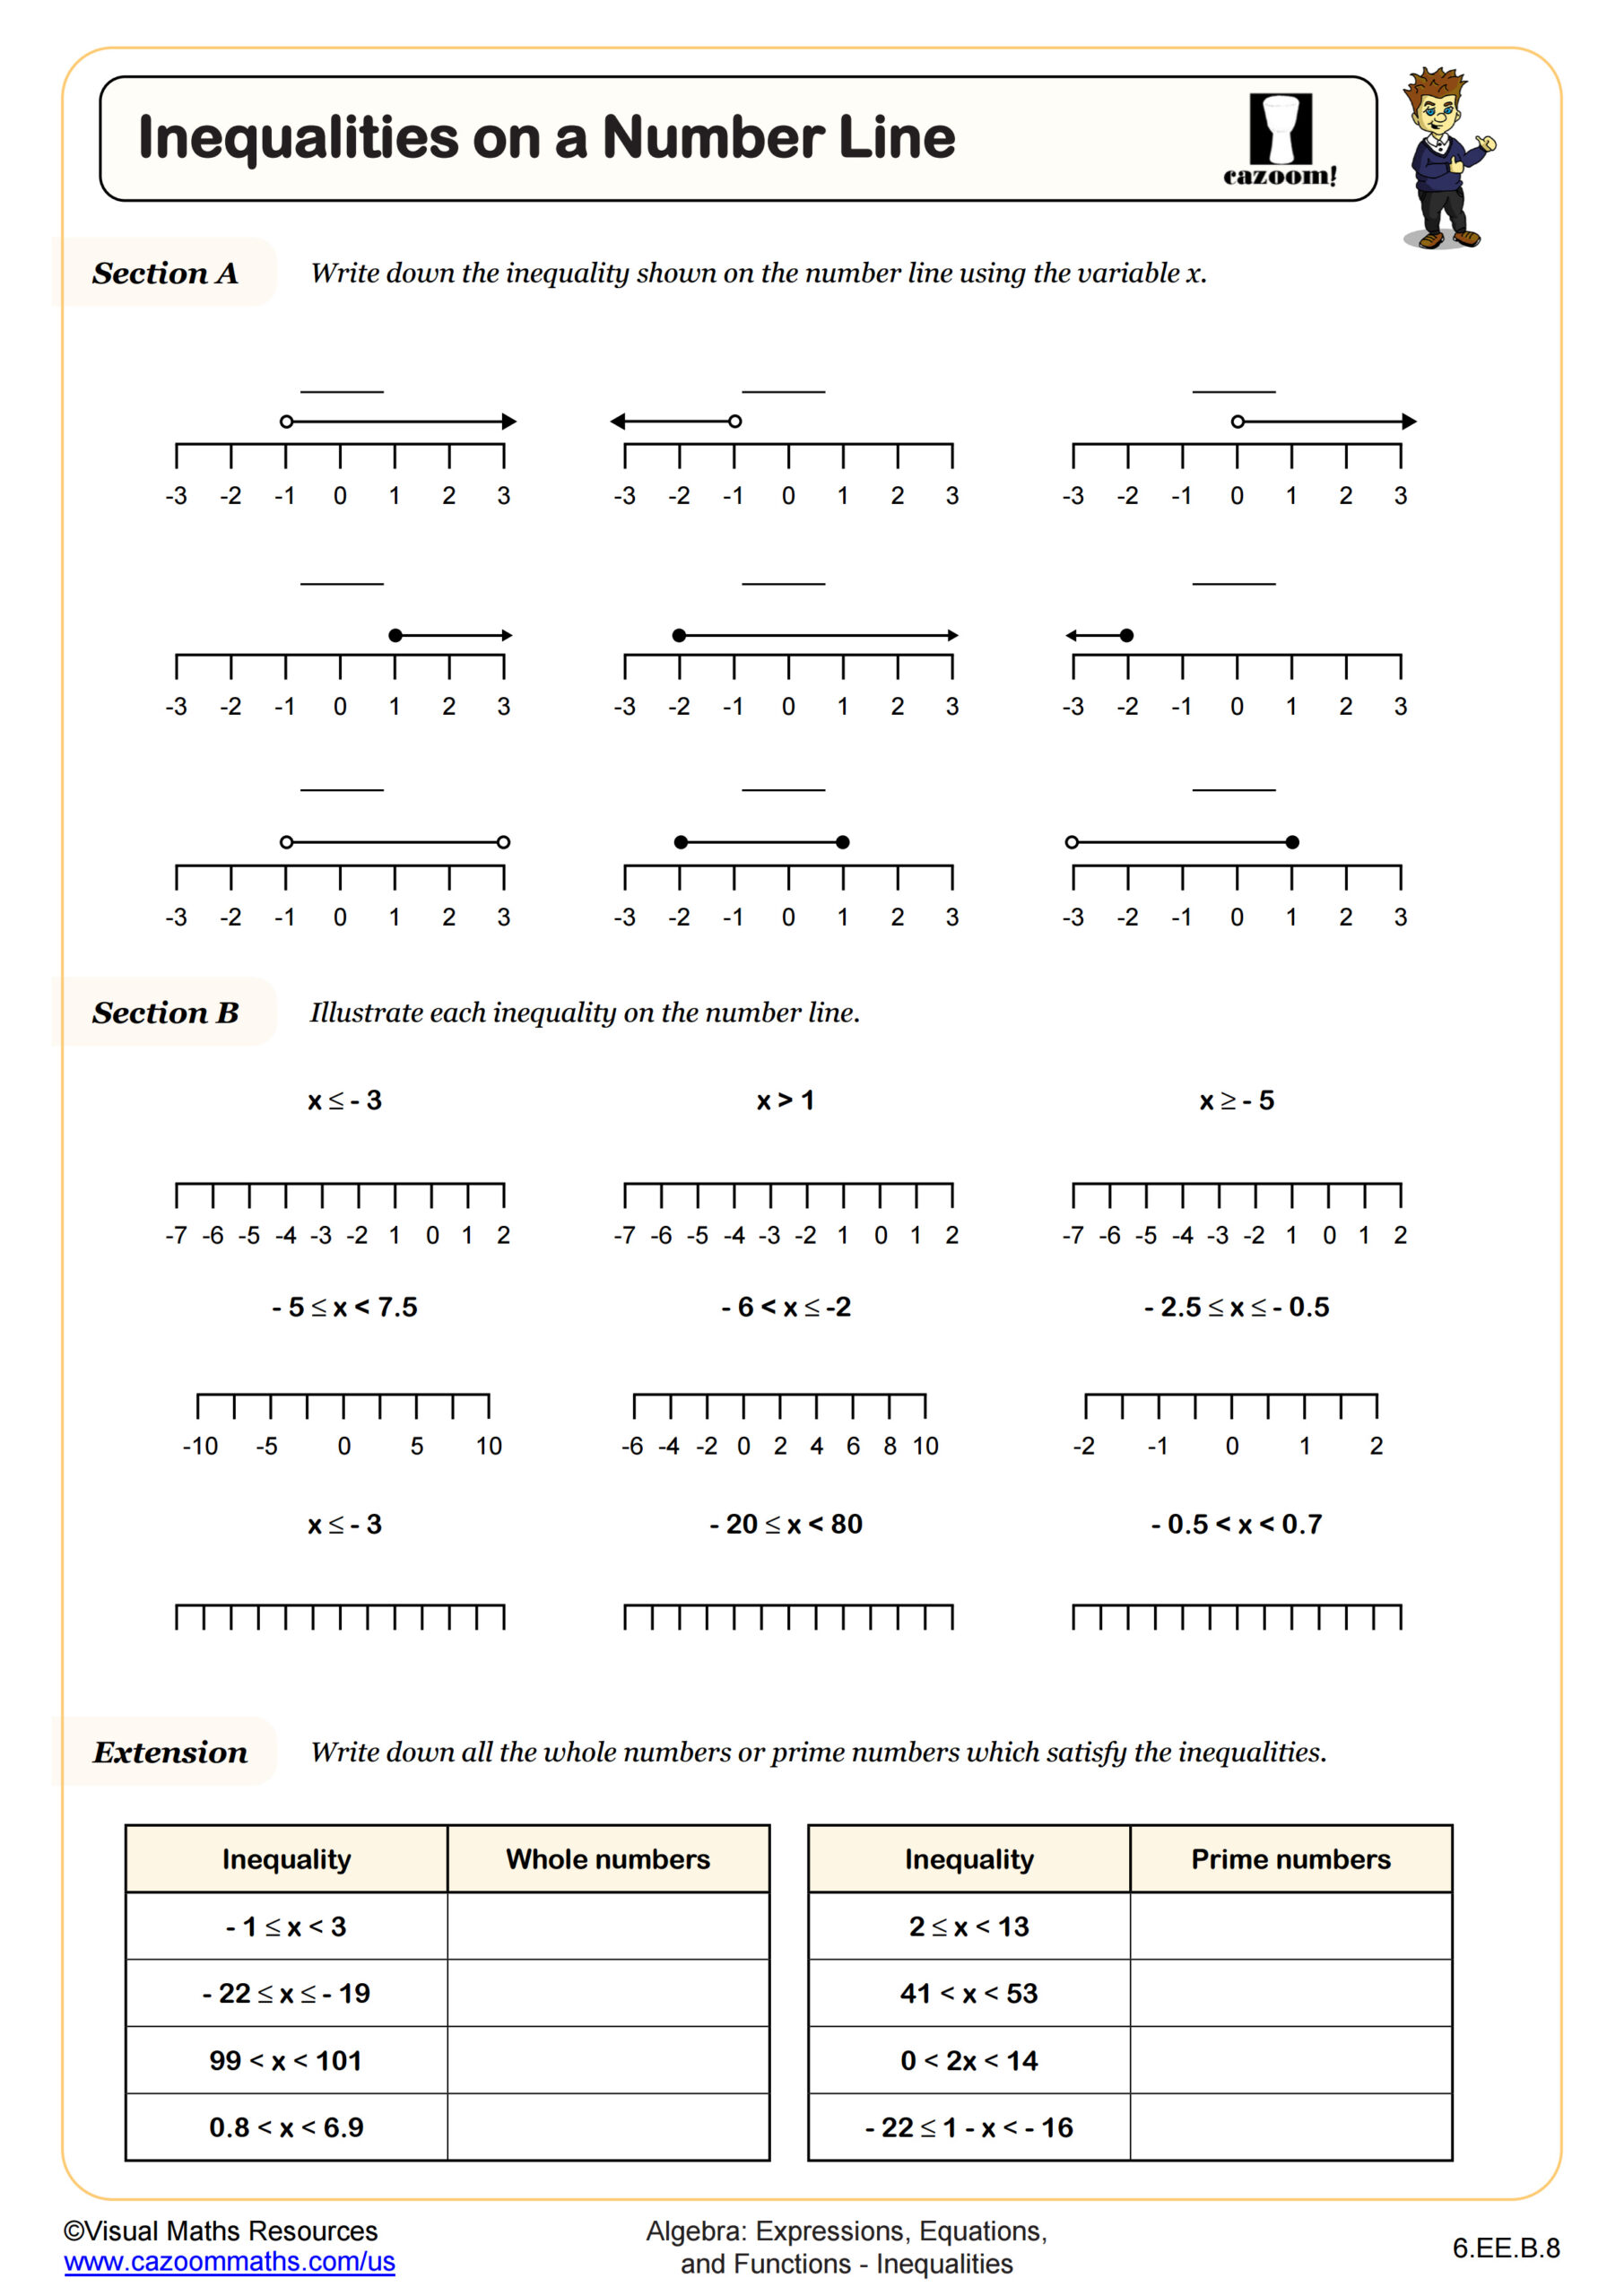
Another common mistake occurs when graphing on number lines: students confuse open and closed circles, especially when working with ≤ versus <. Many students default to closed circles for every inequality until they practice distinguishing between "or equal to" and strict inequalities. Worksheets that explicitly label which values are included in the solution set help students develop this precision.
Which Grade Levels Study Inequalities in Middle School?
These worksheets cover 6th grade, 7th grade, and 8th grade middle school mathematics. Students begin exploring inequalities in 6th grade when they compare quantities and represent constraints, building on their understanding of the number line and order of operations. The topic aligns with Common Core standards that introduce inequality reasoning in middle school.
The progression deepens across grade levels. Sixth graders typically focus on writing and graphing simple inequalities with one variable. Seventh graders solve multi-step inequalities and connect them to real-world situations. By 8th grade, students graph linear inequalities in two variables and shade solution regions on coordinate planes, preparing them for algebra and systems of inequalities in high school.
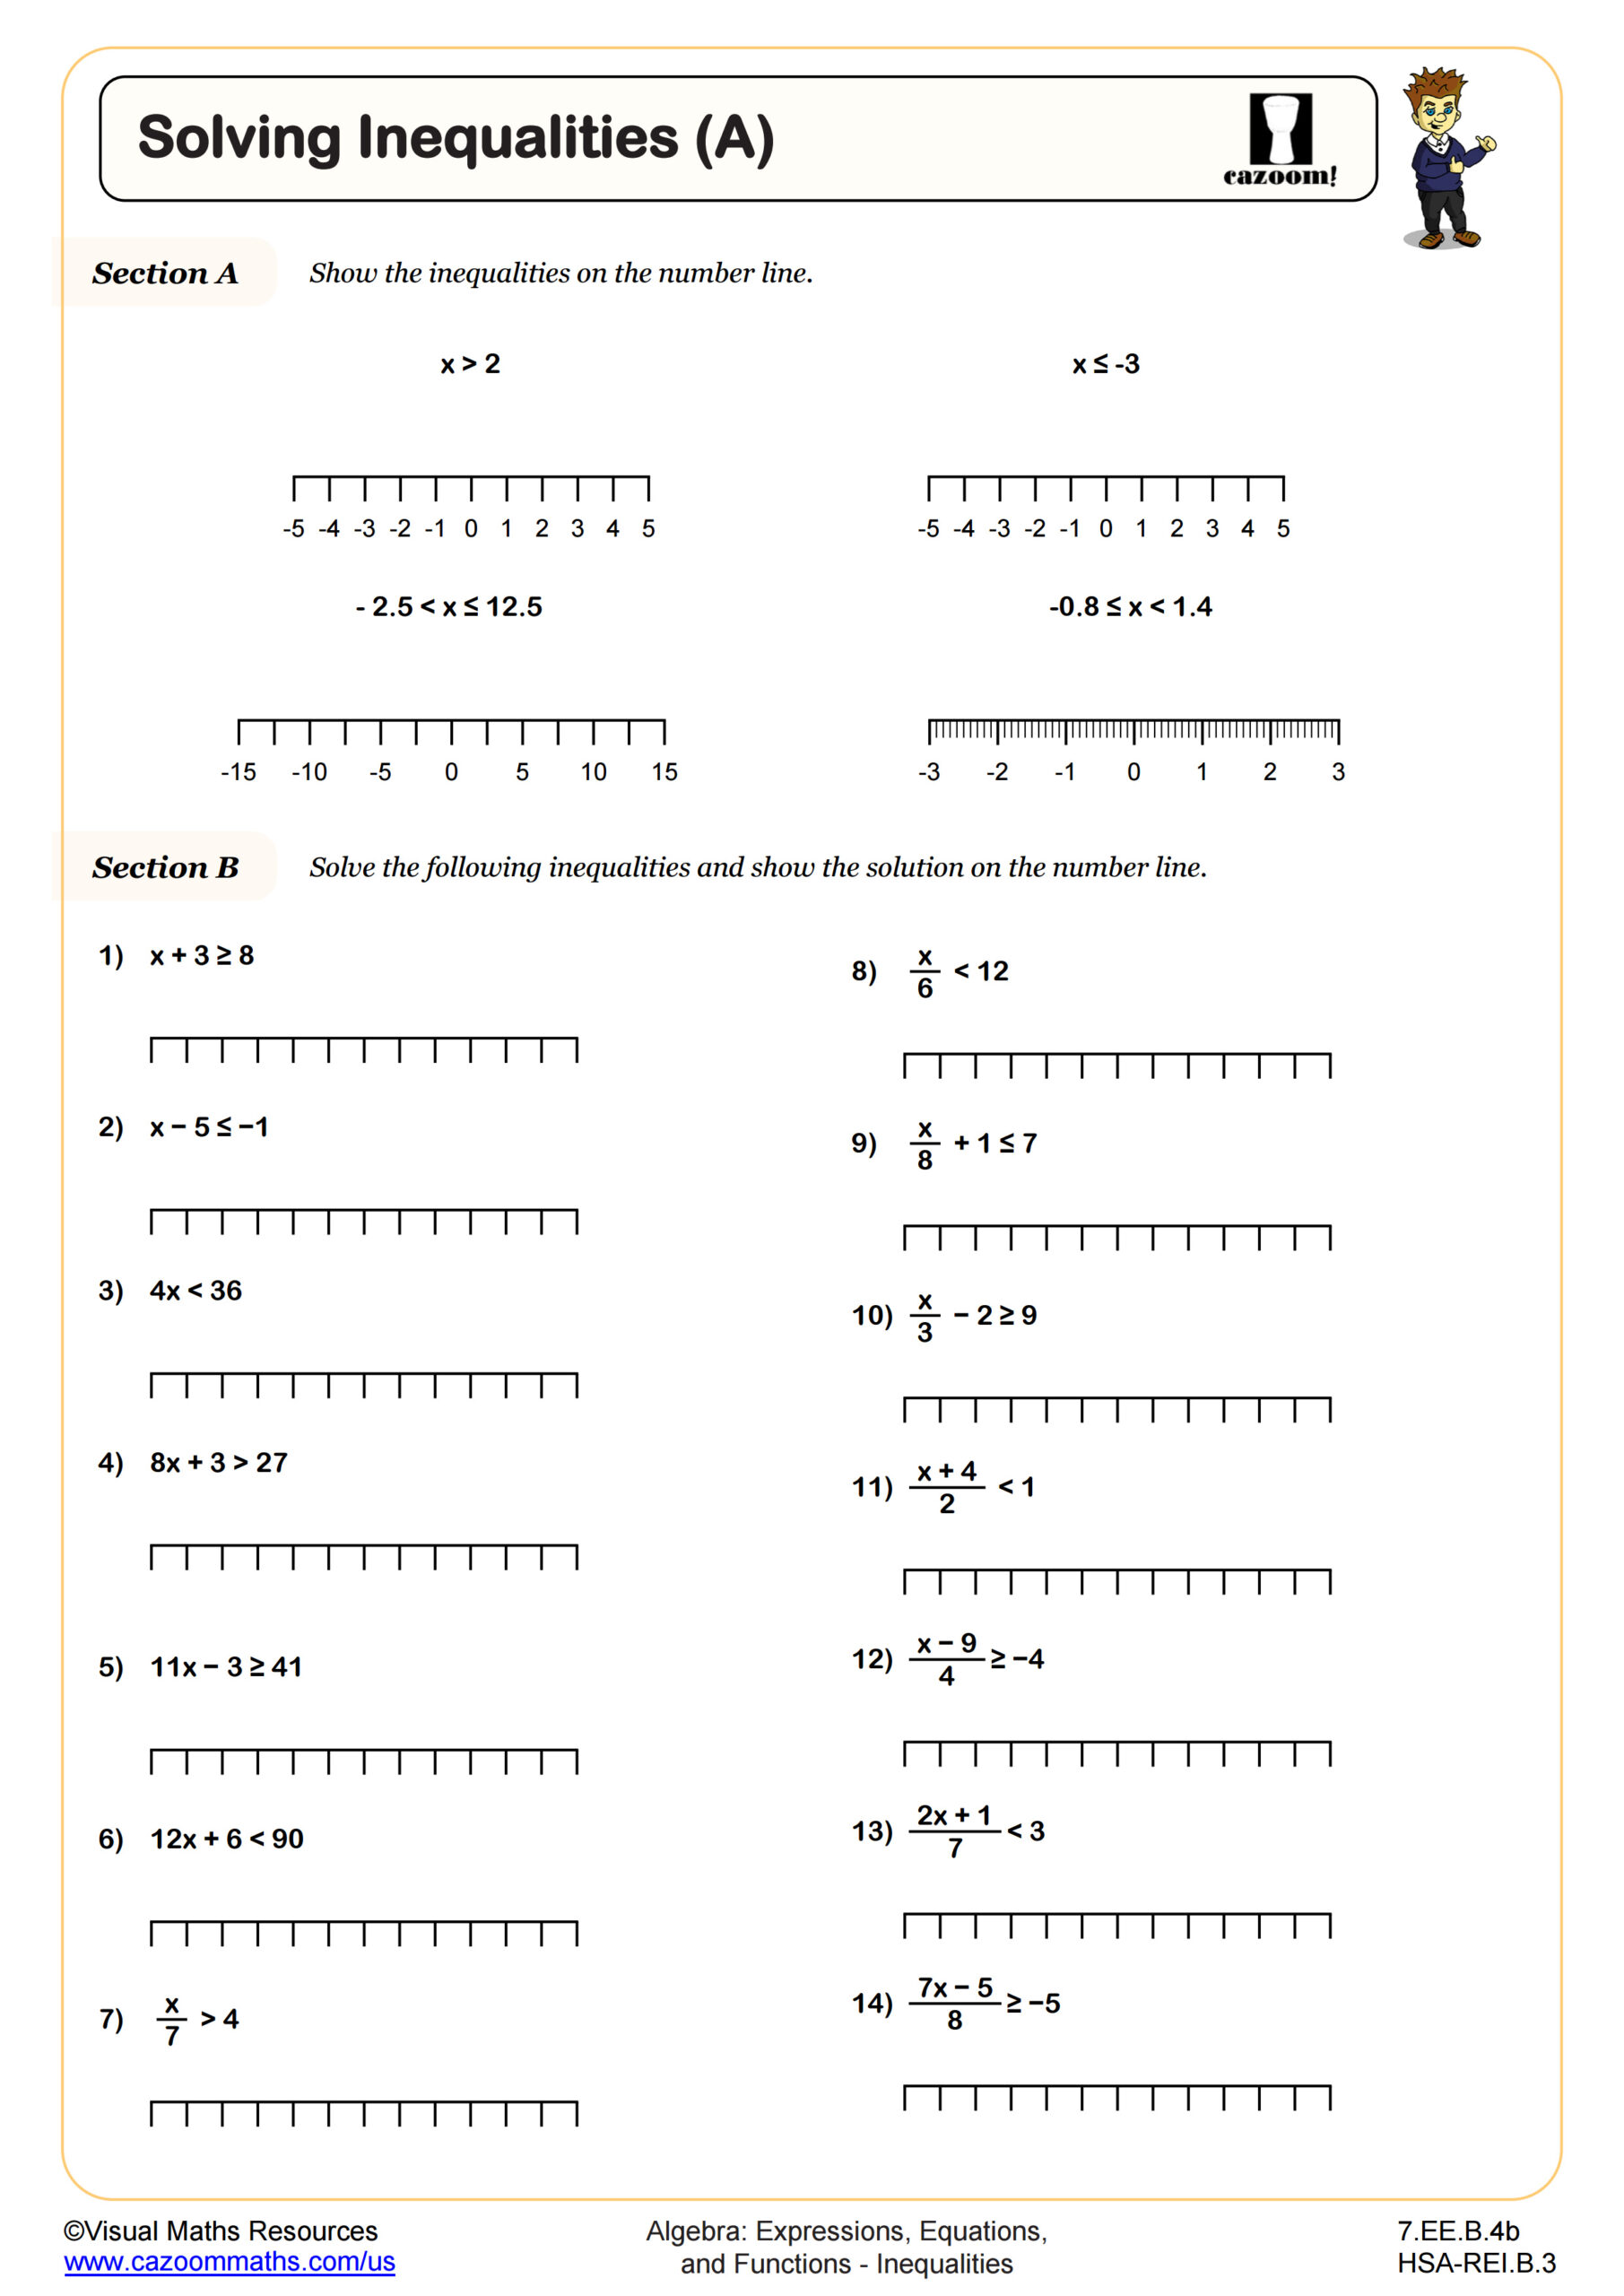
How Do Students Learn to Graph Inequalities on a Number Line?
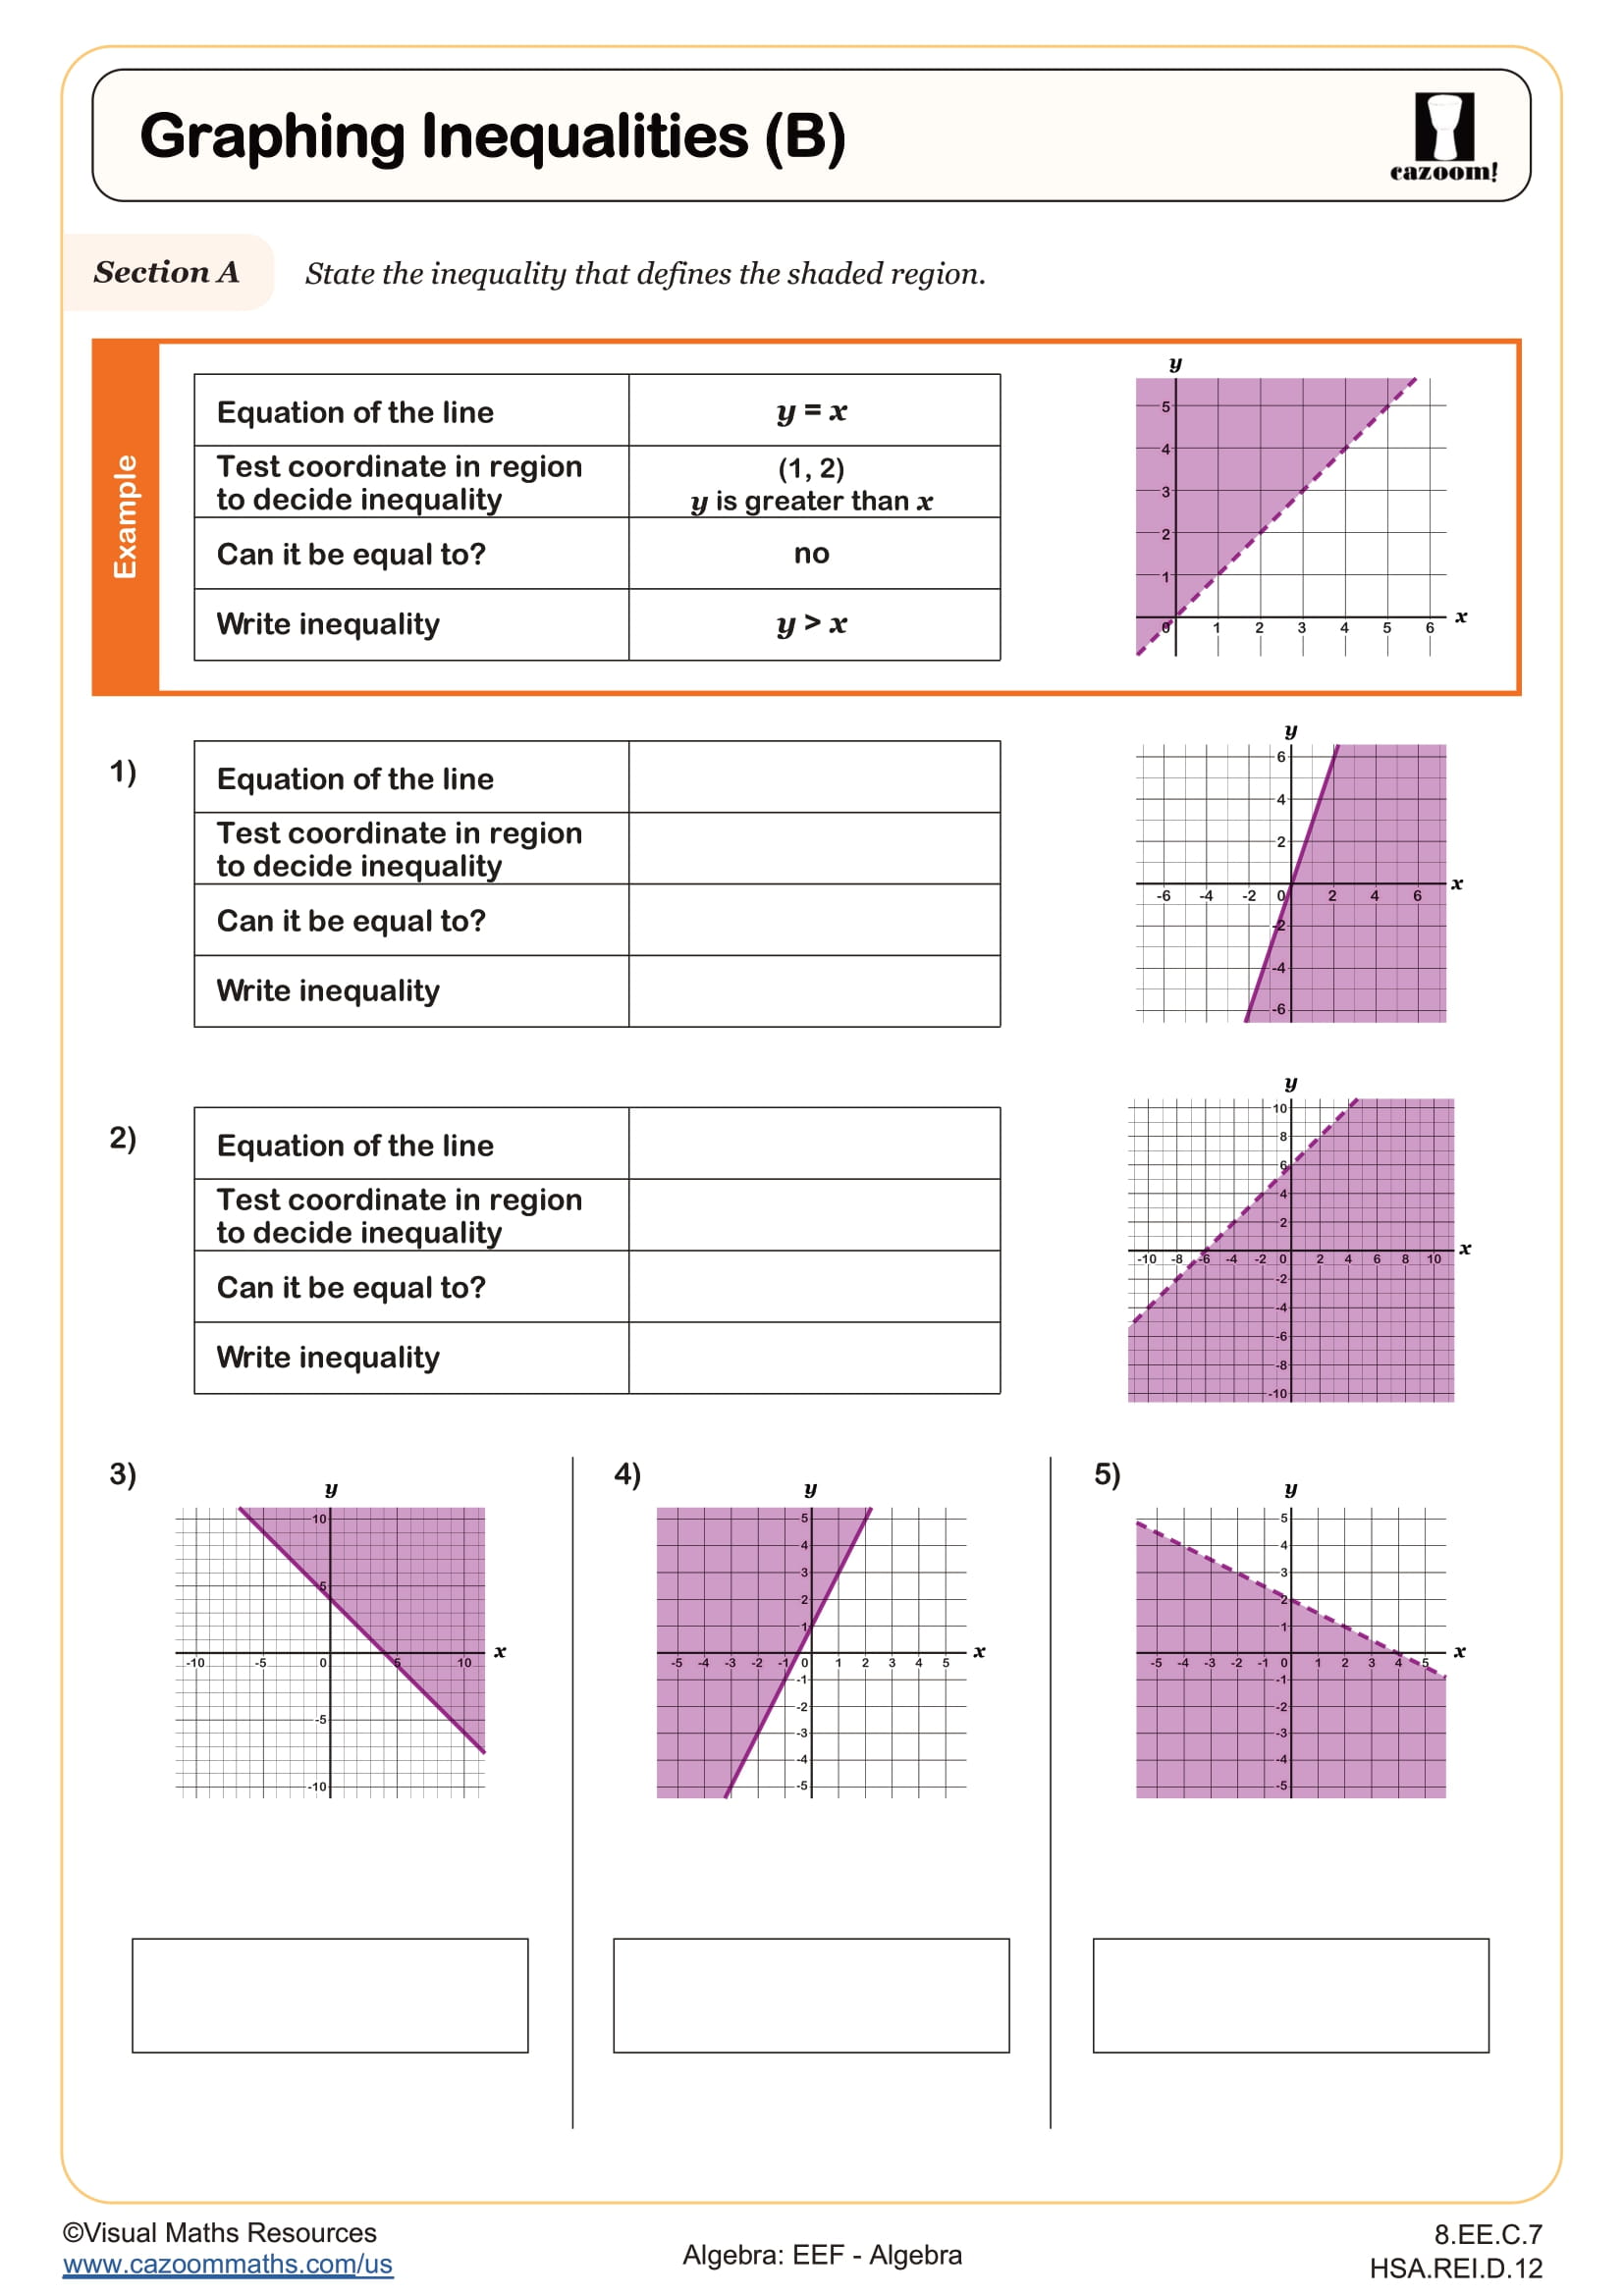
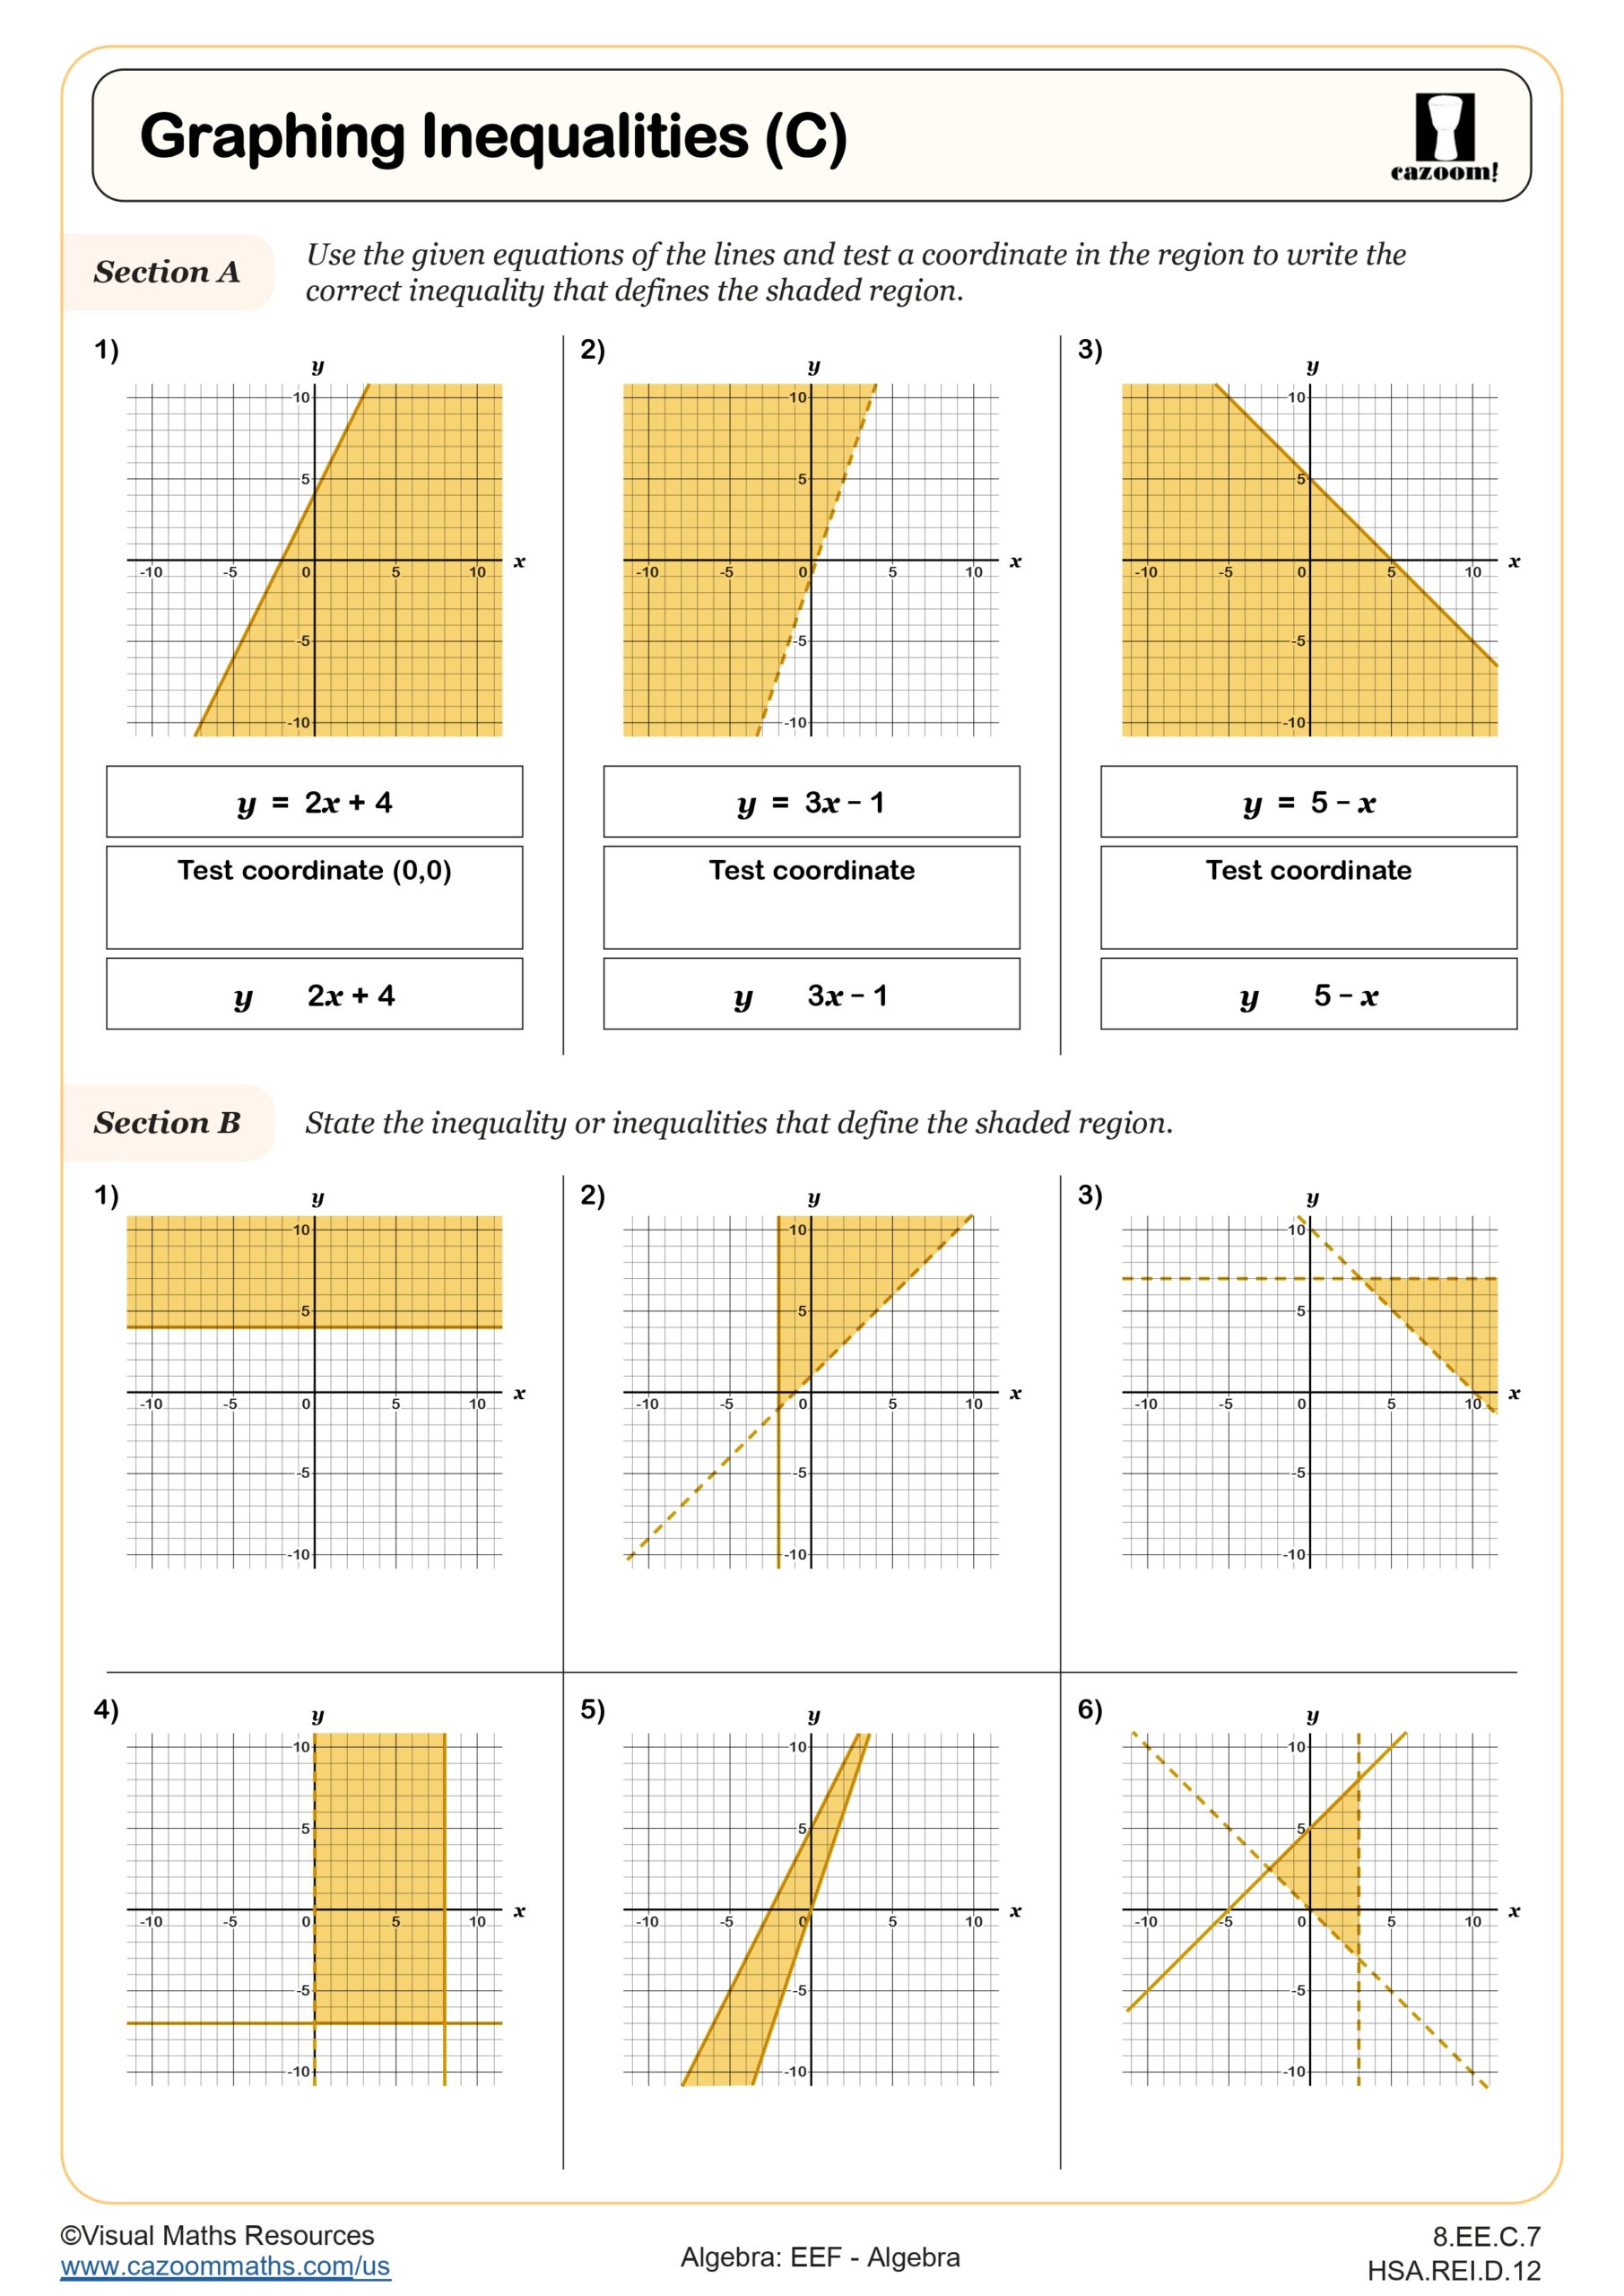
Graphing inequalities on a number line requires students to identify the boundary value, determine whether it's included in the solution (closed circle) or excluded (open circle), and shade the correct direction. Students learn to test values on both sides of the boundary point to verify which direction contains solutions. Teachers find that color-coding the circle type and shading direction reduces confusion during initial practice.
This skill connects directly to measurement tolerances in manufacturing and engineering. When designing components, engineers specify dimensions like "diameter must be less than 3.5 cm" to ensure parts fit together correctly. Students who understand inequality notation can interpret technical specifications, quality control standards, and acceptable ranges in data analysis—applications they'll encounter in STEM courses and careers where precision matters.
How Can Teachers Use These Inequality Worksheets in the Classroom?
The worksheets provide structured practice that moves from recognizing inequality symbols to graphing complex solution sets. Each skill builds progressively, allowing teachers to assign specific sheets that match current instructional focus. The included answer keys enable students to check their work during independent practice or partner activities, promoting self-correction and mathematical discussion about different solution methods.
Teachers use these worksheets for warm-up activities before introducing new inequality concepts, as intervention materials for students who need additional practice with symbol meanings, and as review before unit assessments. The variety of subtopics supports differentiated instruction—advanced students can work on shading regions while others master number line graphing. Many teachers assign select problems as homework and use class time to address common errors revealed in student work.